| |
Home |
File Sharing |
You can Download FFMPEG from here: https://www.ffmpeg.org/download.html
FFmpeg is able to do many things. Among those it can do the following:
As this guide is mainly focused on VOD archiving, I will mainly cover the uses it has for archiving of Vods. If you wish to know more about everything FFmpeg is able to do, the FFmpeg wiki goes into every detail that i can't cover all in this guide: https://trac.ffmpeg.org/wiki/
Here is a quick video about how to install FFmpeg on windows:
https://www.youtube.com/watch?v=r1AtmY-RMyQ --- Mirror of the video: https://files.catbox.moe/o1c16z.mp4 /// https://mega.nz/file/JMoSmJLS#ziSYln_ZBqE18LQ1_koJ267CC4zxiPgF4rVuSm_cZdY
Here are a few things that FFmpeg commands that i frequently use myself for archiving related purposes:
This is useful if you have a split recording that you want to merge into a single VOD. You can change the file format from .mp4/.mp3 to whatever format your files are - I just used these as an example.
Here are the commands you need to use for this:
ffmpeg -i example1.mp4 -c copy -bsf:v h264_mp4toannexb -f mpegts input1.ts
ffmpeg -i example2.mp4 -c copy -bsf:v h264_mp4toannexb -f mpegts input2.ts
ffmpeg -i "concat:input1.ts|input2.ts" -c copy MergedVideo.mp4
In this example, I renamed the first video to "example1" and the second video to "Example2":
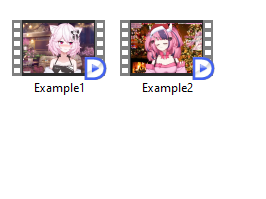
As for the output name, I simply used "mergedvideo.mp4". Of course, you can change the naming of these videos, but to make it easier to understand, I used those for these examples.
So basically what these commands do is re-encode the first two videos and then merge those files:
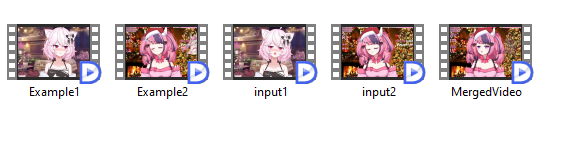
After you've made sure the merged video works as intended without any issues, you can delete everything besides the merged video if you wish to do so.
This is useful if you have a VOD with muted parts and an unmuted audio file - basically, if you are recording streams as audio only, you could use the audio file of that to fix muted parts of a VOD. However, make sure the audio and video file have the exact same runtime, otherwise the audio and video will be out of sync. You can change the file format from .mp4/.mp3 to whatever format your files are - I just used these as an example.
Here is the command you need to use for this:
ffmpeg -i example1.mp4 -i exampleaudio.mp3 -map 0:v -map 1:a -c:v copy -shortest FixedunmutedVOD.mp4
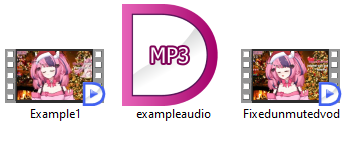
In this example, I renamed the video file to "example1.mp4", and I renamed the audio into "exampleaudio.mp3":
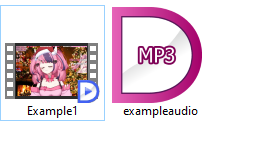
After FFmpeg finishes, you should have the Video with the new audio overlayed:
This is useful for the method I explained above - if you want to share the audio of a VOD you have so someone else can fix the muted parts of their muted VOD, you can simply run this over your VOD and then share the mp3. You can change the file format from .mp4/.mp3 to whatever format your files are - I just used these as an example.
Here is the command you need for this:
ffmpeg -vn -sn -dn -i example1.mp4 -codec:a libmp3lame -qscale:a 4 audioonly.mp3
In this example, I renamed the video file to "example1.mp4" and set the output name as "audioonly.mp3". After you run this command, you will have the ripped audio from the video file that you can share if you want to do so:
This command is also useful if you just want to convert a clip of a karaoke VOD, for example, into an mp3 file.
You may find that your 12-hour VOD is simply too big to store well. Video is incredibly space-consuming, sometimes filling up a megabyte in 8 seconds. In this case, you may want to look into re-encoding your video.
Video files are not stored raw, even in the best quality. They use what's called a video encoding or video codec to compress the ludicrous bitrate of raw video into something that's merely excessive. The same thing applies to audio - so it shouldn't surprise you that, in a given MP4, there's a video codec and an audio codec. There are many video and audio codecs out there - the most supported combination, and the one used by Twitch, being h264 video and AAC audio. As a general rule, the newer a codec is, the better it is at compressing files down. However, newer codecs might lack support and require more computing power to encode and decode.
To re-encode, simply do the following:
ffmpeg -i INFILE -c:v NEWCODEC -c:a copy OUTFILE.mp4
For Twitch VODs, h265 is recommended for re-encoding - but re-encoding is not recommended, due to the large amount of time it may take. Not only that, but it's not just codec that matters - you may also want to choose a quality setting. The default is good, but it could be better.
Here are two shortcuts to the Encode/H.264 and Encode/H.265 pages of the FFmpeg wiki:
https://trac.ffmpeg.org/wiki/Encode/H.264If you want to know about all the other encoding settings it can use, check out the "Encoding" section of the FFmpeg wiki:https://trac.ffmpeg.org/wiki/
| |
Home |
File Sharing |